
What to Expect During a Roofing Installation
When it comes to installing a new roof, it’s easy to feel a bit overwhelmed by the process. Whether you’re replacing an old roof or putting a new one on your home for the first time, understanding the steps involved can make the entire experience much smoother. In this blog post, we will walk you through what to expect during a roofing installation, providing insight into the various stages of the process, the preparation involved, and the final results. Our website link specializes in high-quality residential roofing installation using premium materials.
Initial Consultation and Roof Assessment
Before the installation process begins, the roofing contractor will typically schedule an initial consultation to assess the current state of your roof. During this meeting, the contractor will inspect your roof’s structure, existing materials, and the overall condition of the underlying surfaces. This helps them determine the best course of action, including any necessary repairs before installation can begin.
If you’re replacing your roof, the contractor will also measure your roof and discuss the type of roofing material you’d like to use. Roofing options include asphalt shingles, metal roofing, tile, slate, and more, each with its benefits and price points. This consultation is an essential step in ensuring that you make informed decisions about your new roof.
Material Delivery and Preparation
Once you’ve chosen your roofing materials, the next step is the delivery of these materials to your home. Depending on the size of the project, this could involve several shipments, and the materials will typically be delivered a day or two before the actual installation begins. It’s important to have a clear, accessible area on your property where the materials can be stored.
During this time, the installation crew will prepare the area by covering plants, walkways, and anything that could be damaged by falling debris. They will also set up scaffolding or ladders for easier access to your roof. Preparation is key to preventing accidents and ensuring that your property remains safe throughout the installation process.
Removing the Old Roof
In most roofing installations, especially if you’re replacing an existing roof, the old roofing materials must be removed. This process can be noisy and dusty, as the crew works to strip away old shingles, tiles, or metal panels. Depending on the roof’s condition, this step can take anywhere from a few hours to a couple of days. The removal process typically involves using large equipment to lift and remove debris, which will then be loaded into dumpsters for disposal.
Once the old roofing is completely removed, the contractor will inspect the underlying decking and structure of the roof to check for any damage. This is important because if there are any issues with the roof’s framework, they will need to be addressed before proceeding with the installation of the new materials.
Roof Deck Preparation
After the old roof is removed and the structure is inspected, the next step involves preparing the roof deck. The decking is the foundation upon which the new roofing materials will be placed, and its condition must be pristine for a successful installation. If the deck shows signs of damage, such as rot or water damage, the contractor will replace the affected areas before proceeding.
A protective underlayment will then be applied to the roof deck. This layer helps to protect the decking from moisture, improving the longevity and performance of the new roof. In some cases, additional layers of insulation may also be added to improve energy efficiency.
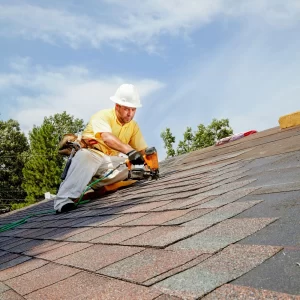
Installing the New Roof
With the roof deck prepared, the actual installation of the new roof begins. The roofing crew will start by installing the first layer of roofing material. If you’re having asphalt shingles installed, this typically involves securing the shingles to the decking, starting at the eaves and working upwards. For metal or tile roofs, the installation process may differ slightly, but the principles remain the same. The roofing materials are laid out in overlapping rows, ensuring that water flows off the roof without causing leaks.
As the crew works, they will ensure that all the seams are properly sealed, and any flashing around chimneys, vents, and skylights is securely fitted. Flashing is a critical component of the roof, as it prevents water from seeping into vulnerable areas, such as where the roof meets walls or around openings.
Finishing Touches and Cleanup
Once the bulk of the roofing materials are in place, the crew will finish off the edges and ensure that all the trim, flashing, and venting is correctly installed. They will also double-check for any areas that need additional sealing to prevent leaks.
After the roof installation is completed, the crew will begin the cleanup process. Roofing installations can create a significant amount of debris, including nails, scraps of shingles, and other materials. The crew will use magnets to comb through your yard to pick up nails and other metal pieces, ensuring your property is free of any sharp objects.
Finally, the contractor will inspect the work to ensure that everything has been completed to the highest standards. They may also walk you through the project, pointing out key features of your new roof, and offering maintenance tips.